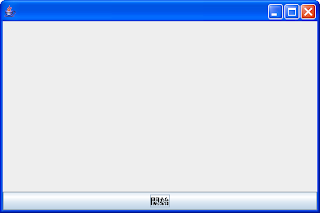
前回作成した、Buttonにクリックイベントを追加してみます。
下記がソースです。色を変更しているところが追加したところです。
package jp.co.hanatann.swing_hello;

import java.awt.Color;
import java.awt.EventQueue;

import javax.swing.JFileChooser;
import javax.swing.JFrame;
import javax.swing.JLabel;
import javax.swing.JOptionPane;

import java.awt.BorderLayout;
import java.awt.event.ActionEvent;
import java.awt.event.ActionListener;
import java.io.File;

import javax.swing.JButton;

public class Swing_Hello implements ActionListener{
 private JFrame frame;

 /**
  * Launch the application.
  */
 public static void main(String[] args) {
  EventQueue.invokeLater(new Runnable() {
   public void run() {
    try {
     Swing_Hello window = new Swing_Hello();
     window.frame.setVisible(true);
    } catch (Exception e) {
     e.printStackTrace();
    }
   }
  });
 }

 /**
  * Create the application.
  */
 public Swing_Hello() {
  initialize();
 }

 /**
  * Initialize the contents of the frame.
  */
 private void initialize() {
  frame = new JFrame();
  frame.setBounds(100, 100, 450, 300);
  frame.setDefaultCloseOperation(JFrame.EXIT_ON_CLOSE);
  frame.getContentPane().setLayout(new BorderLayout(0, 0));


  JButton btnNewButton = new JButton("開始");
  btnNewButton.addActionListener(this);
  frame.getContentPane().add(btnNewButton, BorderLayout.SOUTH);

 }

 /* (非 Javadoc)
  * @see java.awt.event.ActionListener#actionPerformed(java.awt.event.ActionEvent)
  */
 public void actionPerformed(ActionEvent e) {
  //開始のボタンイベントかどうか
  if(e.getActionCommand().equals("開始")){
   //警告ダイアログを表示する。
      JLabel label = new JLabel("Message");
      label.setForeground(Color.RED);
      JOptionPane.showMessageDialog(frame, label);


  }

 }

}

アプリの使用としては、開始ボタンを押して警告ダイアログを表示させる仕様です。
 |
| 開始ボタン押下 |
 |
| 警告ダイアログが表示される。 |
0 件のコメント:
コメントを投稿